Explaining Your Code To An Inanimate Object Is A Programming Trick Known As What? |
|
Think you know the answer? |
|

Explaining Your Code To An Inanimate Object Is A Programming Trick Known As What? |
|
Think you know the answer? |
|

If you’re in the market for a compact and powerful charger for your demanding smartphone or portable device, this is a tough deal to beat: half off an 18W USB-C PD charger from a top notch company.
Normally $21.99, you can pick up the charger for $10.99 off Amazon if you use the code 95SGCK4R (for the black model) or 9VO4Q3XT (for the white model).
What makes this little charger so great? Introduced by Aukey last fall it’s one of the most compact high watt chargers on the market (it’s scarcely bigger than the stock iPhone charger and sports foldable prongs). Paired with a USB-C charging cable you’ll be able to charge your newer iPhone, newer Android device, or other USB-C compatible devices like your Nintendo Switch much faster than you would with their stock charger.
The deal is so hot they’re already out of stock into the coming week, but we recommend buying one anyway and waiting the extra few days, it’s that great of a deal.

Your local library probably offers eBooks and audiobooks via Overdrive. OverDrive can be a bit complicated, but the free Libby app for iPhone, iPad, and Android makes it as slick and easy to use as shopping on Amazon.
Assuming your library supports OverDrive, all you have to do is download the Libby app and sign in with your library card. Use the official website to check if your library supports OverDrive. Libby is actually made by OverDrive and is available on Windows 10, too.
After signing in with your library card details, you can use the Libby app to search for available eBooks and audiobooks. If a book is available, you can instantly check it out, download it, and read it right from within the Libby app. If someone else is reading the book and there aren’t any free copies available, you can place a “hold” just like you would on a physical book. Libby will automatically borrow a held book when it becomes available.

Books you’ve borrowed appear on your “shelf” in Libby. It all works similar to physical books. You can see when the book is due back and renew your loan if no one else is holding it. When your loan period expires, Libby will automatically return the eBook to the library. You can return a book ahead of time if you’re done, too—this will let someone else read it without waiting.
All of this was possible with OverDrive, but Libby just makes it so much more convenient than the old system. Best of all, it’s all free—all you need is a library card. You can even borrow books in Libby and send them to your Kindle.
Your local library probably offers other free digital resources, too, including free streaming movies and TV shows, online courses, and digital newspaper access.
RELATED: Not Just Books: All the Free Digital Stuff Your Local Library Might Offer
Which Of These Films Was Inspired By A Super Bowl Commercial? |
|
Think you know the answer? |
|

Whether you’ve been given an assignment with a strict limit or you just like knowing how many words you’ve written, Google Docs has your back. Here’s how to see exactly how many words or pages you’ve typed in your document.
Finding the page and word count is an easy process that is integrated into Google Docs.
The first thing you want to do is fire up Google Docs and open the document for which you want to get the count. Click “Tools” and click on “Word Count.” Alternatively, you can press Ctrl+Shift+C (on Windows) or Command+Shift+C (on macOS).

That’s it! The word count window pops up and shows you a list of different counts related to your document, including the number of pages, words, characters, and characters excluding spaces.

If you only want to check the count of a specific paragraph—or sentence—in your document, select the text first and then go to Tools > Word Count (or press the key combos) to open the tool.


If you want to bring your Roku TV’s sound to the next level, then you’ll need a proper set of speakers. But why bother with some tangly old-fashioned speakers, when the Roku wireless speaker is on sale for $149?
The Roku wireless speakers are designed to work exclusively with the Roku TV, and they aren’t your average pair of wireless speakers. They’re easy to set up, they can mount on your wall, and they look incredible.
Of course, the Roku wireless speakers have outstanding sound quality. Quiet dialog-heavy scenes will sound clear and crisp, and you’ll be able to feel the violent bass of your favorite song or movie.
These speakers also come with a Roku TV voice remote and a Roku Touch tabletop remote so you can use voice commands to switch through playlists and movies from your couch or your kitchen. These remotes are usually priced at $30 each, and their inclusion makes this deal even sweeter.
Roku wireless speakers usually retail at $200, but Roku is offering them at $149 right now. They come bundled with $60 worth of TV remotes, which is just icing on the cake. Just don’t wait too long on this deal, because it’ll be gone before you know it.
The Windows Installer for Jenkins has been around for many years as a way for users to install a Jenkins Master on Windows as a service. Since it’s initial development, it has not received a lot of updates or features, but that is about to change.
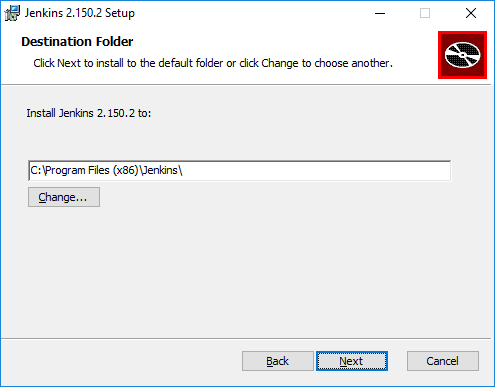
First, let’s take a look at the current installer experience.
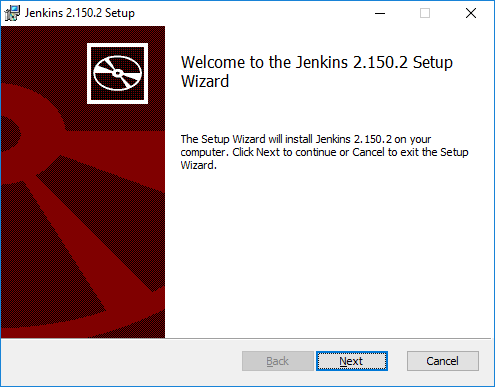
This is the default look and feel for a Windows Installer using the WiX Toolset, not very pretty and doesn’t give much branding information as to what the installer is for.
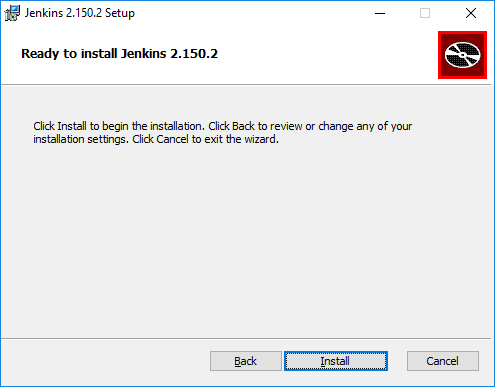
The installer in general does not give many options for installing Jenkins, other than selecting the installation location.
The current installer has a few issues that the Platform SIG wanted to fix in a new install experience for users.
The installer only supports 32-bit installations.
The user could not select ports or user accounts to run the service on.
The installer bundled a 32-bit version of the Java runtime instead of using a pre-existing JRE
The installer did not support the experimental support in Jenkins for Java 11
The JENKINS_HOME directory was not placed in a good spot for modern Windows
There is no branding in the installer.
With the experimental Jenkins Windows Installer, most of these issues have been resolved!
The installer will only support 64-bit systems going forward. This is the vast majority of Windows systems these days, so this will help more users install Jenkins using the installer package.
The user is now able to enter user information for the service and select the port that Jenkins will use and verify that the port is available.
The installer no longer bundles a JRE, but will search for a compatible JRE on the system. If the user wants to use a different JRE, they can specify during install.
The installer has support for running with a Java 11 JRE, including the components listed on the Java 11 Preview Page.
the JENKINS_HOME directory is placed in the LocalAppData directory for the user that the service will run as, this aligns with modern Windows file system layouts.
The installer has been updated with branding to make it look nicer and provide a better user experience.
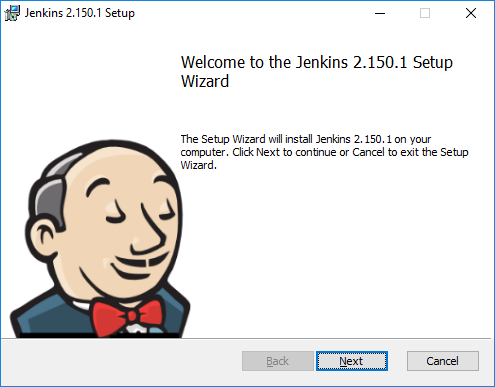
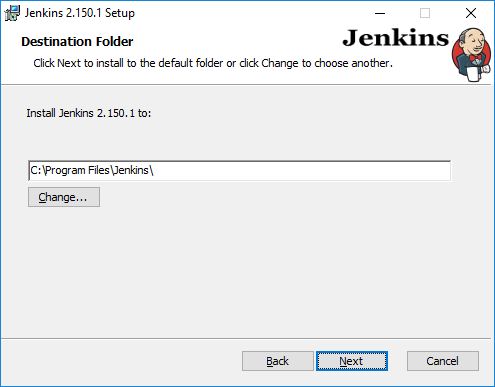
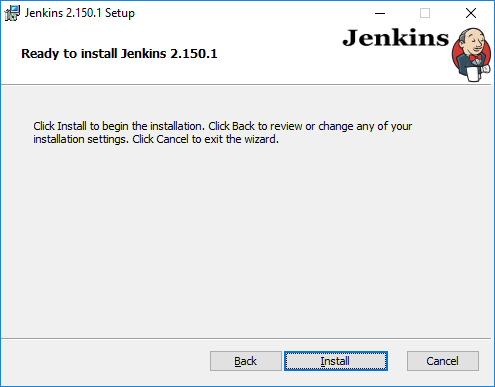
Below are screenshots of the new installer sequence:

The installer now allows you to specify the username/password for the account to run as and checks that the account has LogonAsService rights.

The installer also allows you to specify the port that Jenkins should run on and will not continue until a valid port is entered and tested.
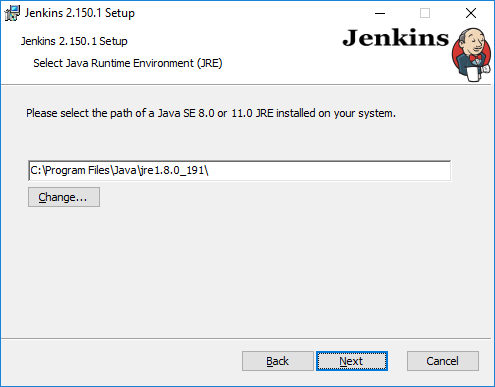
Instead of bundling a JRE, the installer now searches for a compatible JRE on the system (JRE 8 is the current search). If you want to use a different JRE on the system than the one found by the installer, you can browse and specify it. Only JRE 8 and JRE 11 runtimes are supported. The installer will automatically add the necessary arguments and additional jar files for running under Java 11 if the selected JRE is found to be version 11.
The new installer is under review by the members of the Platform SIG, but we need people to test the installer and give feedback. If you are interested in testing the new installer, please join the Platform SIG gitter room for more information.
There are still some things that are being researched and implemented in the new installer (e.g., keeping port and other selections when doing an upgrade), but it is getting close to release.
In addition to updates to the MSI based Windows installer, the Platform SIG is working on taking over the Chocolatey Jenkins package and releasing a version for each update.

We’ve speculated that Huawei will show a 5G foldable phone at MWC 2019. Occasionally, a good tech rumor comes true.
No, MWC isn’t a wrestling championship, It’s Mobile World Congress, one of the biggest three-day mobile-focused tech shows in the world. Based in Barcelona, MWC has become a popular spot for manufacturers to reveal their products, and it’s turned every February into a competitive month for phone manufacturers.
In case you haven’t noticed, this has definitely been a competitive month for phone manufacturers. There are all kinds of rumors floating around about 5G and foldable technology, and Samsung has been strategically showing off advanced new hardware.
Today, Huawei took things a step further. Yang ChaoBin, President of Huawei’s 5G Product Line, took the stage at a Huawei pre-MWC briefing to discuss how advanced AI and 5G technology will be used for Huawei products in 2019. While thanking the audience for their patience, he casually announced that Huawei will reveal a 5G foldable phone on February 24th at MWC 2019.
“We look forward to seeing you in Barcelona in Februrary, where we will launch the world’s first 5G smartphone with a foldable screen.”
As you can imagine, Huawei is probably trying to build some hype for its MWC conference. But the company may have also dropped this announcement to avoid being overshadowed by Samsung. There are rumors floating around that Samsung will reveal its foldable phone—which it already teased late last year—via livestream four days before Huawei takes the stage at MWC. If these rumors are true (they are, let’s be real here), then people may be too caught up in Samsung’s foldable to notice Huawei’s announcement.
If you’re trying to attend this historic conference, then you’ll want to buy tickets ASAP, because Huawei’s keynote is on February 24th, 2PM Barcelona time. Or you can try to catch a livestream at 8AM EST, whatever floats your boat.
via The Verge

The Doctor is in…or at least he will be later this year. Nintendo announced this morning that it was planning on bringing one of its first puzzle games, Dr. Mario, to mobile platforms this summer.
Dr. Mario debuted on the original NES console nearly thirty years ago, with a winning combination of Tetris-style gameplay, randomized hazards on the puzzle boards, and fantastic 8-bit music. The series has seen a few revivals over the years, notably on the Nintendo 64, Wii, and 3DS. Dr. Mario World will be the title of the new mobile game.
Phones are a particularly good fit for puzzle games thanks to easy touch controls and bite-sized play sessions: the smash hits of Bejeweled and Candy Crush demonstrate the natural synergy of the platform. Like most successful mobile games, Nintendo will offer the game for free with in-app purchases for power-ups.
Dr. Mario World is being co-developed with mobile publisher LINE, and it joins existing Nintendo franchises Super Mario Run, Fire Emblem, and Animal Crossing on mobile. Other upcoming Nintendo mobile games include Mario Kart Tour (expected later this year) and a new Legend of Zelda title.
Source: Nintendo

The Mac, just like iOS, has more than its fair share of fancy animations that accompany most user interactions. They can look pretty great, but they can also make people prone to motion sickness feel unwell. That’s no good, so here’s how to disable them.
Unfortunately, no matter what you do it’s impossible to stop macOS from getting a little carried away with itself, flinging interface elements around the screen with nary a thought for your health. You can, however, limit the amount of on-screen motion to which you are subjected to by ticking one checkbox.
The “Reduce Motion” option is one that does exactly what it sounds like. By reducing the motion and animations on-screen, the setting should make it easier for everyone to use their Mac without feeling queasy. If you suffer from motion sickness, this is a setting you absolutely ought to try.
As the description of the feature might lead you to believe, “Reduce Motion” is an accessibility setting, so to get started head on over to System Preferences. To do that, click the Apple logo at the top of the screen and then click “System Preferences.”

Next, click “Accessibility.” You’ll find it towards the bottom of the System Preferences panel.

In the left pane, click the “Display” category. On the right, tick the “Reduce Motion” checkbox to enable to feature.

AirPods are pretty impressive; there’s little doubt of that. But even though they connect to iOS devices without any fuss, their integration with macOS can be altogether more fiddly. This utility fixes that, and it looks amazing while it does it.
As you’ll know if you own AirPods, connecting them to an iOS device after initial pairing is a simple case of selecting them as an audio output. It’s almost magical, but when it comes to selecting AirPods for use on a Mac, you can be left fumbling around with Bluetooth settings, or trying to select the right outputs in System Preference windows. It’s just nowhere near as slick as it should be, and it’s honestly inexcusable that macOS doesn’t connect to AirPods the same way iOS does.
But you can fix all of that with AirBuddy, a lightweight utility from developer Guilherme Rambo. This is the developer who made a name for himself by spotting devices deep within iOS beta code before they’re announced, so he clearly knows his way around Xcode. It shows, too, because AirBuddy brings iOS-like AirPod functionality to the Mac, all for just $5.
Once installed, AirBuddy first shows itself when you open the AirPods Charging Case near your Mac. When you do, you’ll see a gorgeous, animated representation of your AirPods and their case, along with their current charging status. If you’ve seen the iconic view that iOS users get when doing the same thing, you’ll know what we’re talking about, and it looks right at home on a Mac.
Looking great is one thing, but there’s functionality here, too. To prevent the connection dance with which Mac users are all too familiar, AirBuddy offers a simple “Click to connect” button that connects your Mac to your AirPods and selects them as the output option without you having to do anything yourself. It’s a thing of beauty and, again, Apple should have built this right into macOS.
There’s more to this box of tricks, too. AirBuddy also provides a Notification Center widget that can display not only your AirPods battery life but also that of your Mac (assuming it’s a laptop). On top of that, any iOS device connected to that same Mac also shows up there, so long as it’s connected to the same Wi-Fi network. That’s worth the price of admission alone!
Amazingly, there’s even more on offer here. While AirPods are the biggest use case, AirBuddy will also work just fine with anything that has a built-in W1 chip. That means there are some Beats options on the table, too.
Download AirBuddy. It has a suggested price of $5, but you can pay more if you want.

Chrome has the useful ability to open a website as a window that doesn’t show the browser interface or open external links in a new tab. Or, rather, it did: in a late 2018 update, Google disabled this functionality on Windows and macOS.
We can’t tell you why Google decided that only its own ChromeOS devices would get this functionality from now on, though if you’re upset at its loss, you’re not alone. I’ve spent years using the “Open as window” function to make impromptu web apps easy to open and manage.
But there’s a way to get them back, at least for the moment. Here’s how.
Applicationize.me turns any standard website into a downloadable CRX file, which can then be “installed” in Chrome as if it were a Chrome extension. It’s not—the “app” will only be the website you choose, in its own thin window with a link. But it’s a useful little hack nonetheless.

Note that normally, we advise users to be wary of unnecessary browser extensions and applications. But in this case, you’re merely using a standard website, and it’s no more dangerous than any other (though, do make sure the site itself isn’t dangerous, of course).
To get this done, open the site you want to use as an “Open as window” link, then open Applicationize.me in a new tab. Copy and paste the site from the first tab into the field marked “WEB APP URL.”

The Most Expensive Super Bowl Rings Were Purchased By Which Team? |
|
Think you know the answer? |
|

Are you an experienced writer who has life skills you want to share with the world? We’re looking for general interest freelance writers for another publication, and we’d like to hear from you.
We need smart, curious, detail-oriented writers who are comfortable researching and writing advice about various aspects of life in general. This is an ongoing freelance position, and we’re looking for writers who can start immediately.
In particular, we’re looking for experienced writers in the following areas:
And don’t worry if you don’t have experience in all those topics. Even if you can write about one or two of them, we want to hear from you.
All of our writers should have the following qualities:
Send an email to jobs@howtogeek.com with the subject General Interest Writer and include the following in your email:
We don’t have normal office hours or even an office, so you can be located anywhere (including outside the US)—this is strictly a telecommuting job.
So what are you waiting for? Email us already!

Several months ago, Lowe’s announced that it would be seeking a buyer for its Iris smarthome platform. However, it appears no one wants it, as Lowe’s has announced it’s officially shutting down Iris.
In an official statement sent to Review Geek, Lowe’s says that it “will shut down the Iris smart home platform and services on March 31” and will be refunding eligible users who bought Iris devices, although the specifics on that aren’t yet known. You can read the full official statement from Lowe’s below.
Lowe’s announced today it will shut down the Iris smart home platform and services on March 31, 2019. We apologize for any inconvenience to our Iris customers and are committed to providing the resources and support needed to transition to a comparable smart home platform. We have created an online redemption process that will allow Iris customers to receive a Visa prepaid card for eligible, connected Iris devices.
After carefully evaluating a range of options, the decision was made to shut down the Iris platform once it was determined that none of the alternatives would allow Iris to continue to deliver the experience our customers have come to expect of us. Lowe’s remains committed to carrying the breadth and depth of smart home products and brands to meet our customers’ needs now and in the future.
Lowe’s launched Iris back in 2012, and the product line offered a handful of different ZigBee and Z-Wave devices and sensors, as well as a proprietary Iris hub. The nice part, though, was that these devices also worked with other smarthome hubs, like Wink and SmartThings. Iris also integrated with other product lines like Philips Hue and Nest.
However, now with Iris officially out of the game, we’ll see if any of the other players step up to bat in a big way.

Upgrading to a new version of Windows is often a straightforward affair. But when something doesn’t go right, you’re left with vague errors that aren’t helpful. In the next version of Windows, Microsoft will try to solve that.
If you’ve ever encountered an error during Windows Setup, you’ve probably been left completely frustrated and wondering what to do. The message you see most likely didn’t have any description of the problem and just listed the letters KB followed by a string of numbers. If you tried to search, you were lead to dozens of entirely different entries that didn’t match up to your KB numbers and did nothing to clarify the situation.
Microsoft has started showing off new setup screens to directly tackle this issue in a recent Windows Insider Webinar, as spotted by WinFuture. Starting at just after the hour mark, Microsoft’s James Atkins and Julia Troxell laid out the problem clearly, and the steps they are taking to solve this problem going forward.

The problem at hand isn’t just limited to the vague error, but also to the lack of actions the users can take to mitigate the problem. With the current setup dialog, you have an error message but no link to more info to learn exactly what is wrong. You have “Back” and “Refresh” buttons, but neither of these buttons solves the problem—they’re only options available to the user. Usually, the solution is as simple as uninstalling and reinstalling or updating a program or disabling encryption, but Windows Setup currently does a terrible job of letting the user know.

The new Setup dialogs present more information with direct links to error articles. If additional options are possible, such as upgrading a program instead of uninstalling, then you will be prompted to “learn more or update instead.”. Where possible, the dialog offers solutions; if it’s possible for Windows to handle an uninstall it will present that option, when it can’t (because the program isn’t in Add/Remove programs) then a manual installation is suggested.
The key point behind these new dialogs is to provide you with everything you need to know to complete the upgrade, or where it’s not possible to upgrade all the information you need to understand why. That should reduce frustration and help the Setup process go more smoothly.

For some inexplicable reason, Apple decided to disable Dashboard by default in macOS Mojave, and it’s nothing short of a travesty. Thankfully, turning it back on is a simple affair. Here’s how to go about restoring Dashboard to its rightful glory.
For those unfamiliar with Dashboard, it’s a collection of widgets that has been around ever since Mac OS X 10.4 Tiger shipped many years ago. Dashboard lets you select widgets you can easily access without interfering with other apps, or having to launch any apps to do a simple task. Calculators, sticky notes, easy access to the weather, and more were perfect uses for Dashboard. Think of how widgets work on iOS, and you’ve got the right idea.
We’re not sure why, but Apple has left Dashboard to languish, completely disabling it in macOS Mojave. That’s a real shame because we often find ourselves wanting to do a quick calculation, for example. Opening the Calculator isn’t difficult, but there’s no need if you have a calculator a key press away.
Dashboard is great if your workflow from previous versions of macOS relies on it, so here’s how to get it back.
To start things off, click the Apple logo at the top of the screen and select “System Preferences.”
With System Preferences open, click “Mission Control.”


Late last year, it was revealed that Hulu would start showing ads when users pause a stream. While this sounds absolutely terrible, how this is going to work in reality doesn’t sound so bad.
First off, these won’t be video ads, but instead just static images on the side of the screen. That immediately makes it less obtrusive and keeps the ads out of the way. Really, it’s a smart way of doing it, because it doesn’t bother users that much and keeps the ad revenue coming for Hulu.
The second part of the equation here is who will see these ads. That answer is equally as simple: according to Engadget, any user who subscribes to Hulu’s ad-supported tier—which just got a couple dollar price drop, by the way—will be subject to this new ad format. Users who subscribe to Hulu’s ad-free tier will continue to, well, not get ads. Pretty simple.
Finally, there’s the when. These ads will start to roll out “this spring,” which is just right around the corner despite what weather reports look like today.
via Engadget