Thursday, 3 January 2019

How to Customize the Theme and Formatting for Outlook Mail

Bored of using “Calibri, 11pt” for every mail you send in Outlook? Default bright, white email background making your eyes hurt? Fear not, you can change the default email theme to be whatever you want, and here’s how.

Change the Theme for a Single Message

If you want to change the theme for a single message you’re creating, go to Home > New Items > E-mail Message Using > More Stationery.

This will open up the “Theme or Stationery” window, where you can pick whatever theme you want.

Select the theme from the left menu to see a preview in the right-hand panel, and when you’ve found one you like, click “OK” to apply it to your message.

Change the Theme for All Messages

To change the default theme for all messages you send, go to File > Options > Mail (or File > Options > Ease of Access) and click the “Stationery and Fonts” button.

Read the remaining 23 paragraphs

How to Add Third-Party Locations to Turn the iOS Files App into Finder

The Files app was introduced to the iPhone and iPad with iOS 11 in 2017, and it brought much-needed file access to iOS. In typical Apple fashion, its real power is well hidden. Here’s how to turn Files into Finder for iOS.

If you’ve ever ventured into the Files app, you’ve no doubt seen it in its most basic form. Before you add any additional sources of files—which Files calls “Locations”—things can look pretty sparse. Sure, browsing files that are saved locally to your device is way better than what we had before, but things get super interesting once you start adding more locations.

Locations are areas of storage that iOS apps can present to the Files app, essentially allowing you to dip into those apps and the data they have stored, all from within Files. That doesn’t sound all that amazing until you think about the kinds of apps that support Files. Dropbox, Google Drive, and OneDrive immediately spring to mind, and with any of those added as a location, you can browse the contents of those cloud storage providers right from within Files. Everything syncs just as it would from within the apps, so if you add a file to your Dropbox folder on a Mac, it appears in the Files app and vice versa.

It’s this kind of integration that goes a long way to making Files act like Finder, but there’s more, too.

Apps that you wouldn’t normally associate with storage can also present information to Files. One example would be the excellent Keep It, an app for organizing files such as PDFs, images, and more. Keep It also presents everything it holds as a Location in Files, giving you instant access to everything without opening the app. Want to add a file to Keep It to be processed at a later date? Just drop it into the Keep It location in Files, and it’ll be waiting for you no matter whether you open the app on your iPhone, iPad, or even your Mac.

So, how do you make all of this magic happen? It’s surprisingly easy!

Adding a Location in Files

To get started, open the Files app on your iPhone or iPad.

Read the remaining 10 paragraphs

Thriving Strategies just for best virtual data room Used At this time

The Hidden Gem of Files Room in your home Your data area can give the ability with regard to a range of individuals to work together and also discuss data files which usually needs to be risk-free for contrasting explanations. In reality, a strong on the internet info living room is a lot more economical and even reliable as compared with standard procedures involving information transaction. It is normally a terrific way for you to take care of business wirelessly. It really is covered by means of security measure options of which will always be clarified throughout the understanding. Data bedroom is an crucial software regarding owing diligence. An electric data living room is extremely beneficial inside business transactions. The [...] Continue Reading

The Best Bags For One-Bag Travel

One-bag travel is one of the latest ideas to start to make the leap from niche online communities to Instagram to the mainstream.  Here’s what it’s all about and our top picks to get the most out of one-bag travel.

The idea is that you travel—often for extended periods of time—with just what you can fit in a carry-on backpack. A whole range of bags have cropped up to answer the needs of Instagram influencers, but which is the best? Read on to find out.

What Is One-Bag Travel

One-bag travel, like many #hashtag #labels, is pretty open-ended and really, nothing new. In its purest form, it’s traveling the world for extended periods of time with only a small carry-on backpack. The kind of people who pull that off only own one t-shirt and cut their toothbrush in half to save weight. They can, however, literally carry their life on their back pretty much anywhere.

Most people aren’t prepared to go that minimalist so a lot of people, myself included, use a bag that is the max legal carry-on size for most airplanes. It lets you bring a reasonable amount of stuff—I carry my camera, laptop, three days worth of clothes, gym gear, and toiletries, basically—while still being pretty flexible. You probably don’t want to lug everything around with you all the time, but you can get by, especially once you ditch the really heavy stuff in your Airbnb or hotel. This is the kind we’ll mostly be looking at.

At the far end of things, you’ve got rebranded backpacking bags. They have gigantic rucksacks, that definitely don’t fit in a carry-on bin, filled with everything they need to hitchhike around Europe for three months. All that’s new is the #hashtag; people have been doing this kind of travel for years. It’s really outside of what most people talk about when they say “one-bag travel”; it kind of carries connotations of minimalism and cutting back on the amount you bring, in the same way that sleeping in your car for a few nights isn’t really #vanlife. This isn’t to knock backpackers: it’s just that we’re not going to be looking at the heavy, load hauling packs they use. It’s the midsize bags where there’s been all the interesting developments.

What We’re Looking For In a Good Travel Bag

Before diving in, I’m going to lay out the criteria I used for selecting these bags. I’ve personally handled them all and talked to people who travel with them. I’ve also owned and used two of the three picks. So here’s what I was looking for:

  • It had to a backpack. No rollaboards or gigantic duffels.
  • It had to be big enough to carry a reasonable amount of gear. Most people have more than one t-shirt.
  • It had to be small enough that you could carry it for extended periods of time, even if it was heavy. No gigantic 100L trekking packs.
  • It had to be backloading or clamshell opening like a suitcase. These are travel bags, not ergonomic hiking packs.
  • It had to be able to carry a laptop safely. Again, travel, not hiking.
  • It had to be really well made. We’re talking great manufacturing and high-quality components. These bags are all expensive so they couldn’t skimp on anything.
  • People who used them had to love them. Different people have different needs so this isn’t a one-bag wins situation.

Now, let’s dig in.

My Favourite: The Peak Design 45L Travel Bag ($300+)

Read the remaining 20 paragraphs

How to Search All Streaming Services For a Movie or TV Show

Is the TV show you want to watch on Netflix, Hulu, Amazon Prime, or HBO? And which service has the best price for a digital movie rental? The below solutions will answer those questions in an instant.

Search From Your TV’s Streaming Box

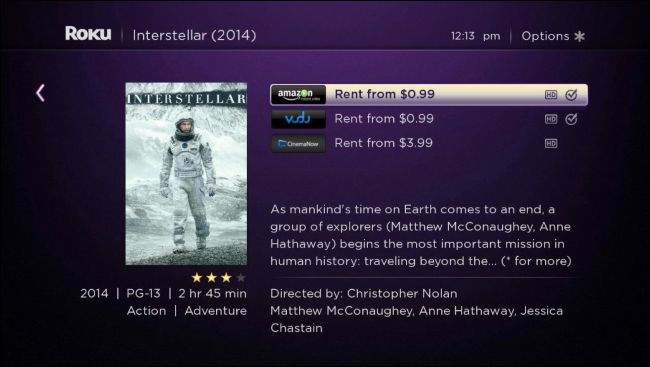
All the big modern TV-streaming boxes, including the Roku, Apple TV, Fire TV, and Android TV devices—have built-in search features. They search multiple apps at the same time, and you can type out the name of a show or movie using your remote control or speak it aloud with your voice.

  • Roku: Use the search feature on your Roku’s home screen to search for the name of a movie or TV show. You can also press the voice button on your remote control and speak the name of a movie or TV show to search for it. Your Roku will show you where the movie or TV show is available across multiple services, and you can select an option to start watching it quickly. Roku also lets you search for an actor or director’s name.
  • Apple TV: The Apple TV works just like the Roku here. You can either use the Search app on your Apple TV or ask Siri for the name of a movie or TV show. With Siri, you can also search by genre, actor, and other details.
  • Fire TV: Amazon’s Fire TV also lets you search for movies and TV shows, either with the search feature or via Alexa. If a movie or TV show is available on multiple services, you’ll see a “More Ways to Watch” option that shows you other services offering the same movie or TV show.
  • Android TV: Google’s Android TV also lets you search within apps. Just use the search box on the home screen, or press the microphone button on your remote and ask Google Assistant for the movie or TV show you want to watch. It’ll search multiple streaming platforms.

Each of the above streaming boxes is different, and some boxes may search more or different sources than others. You may want to try a different search solution if you can’t find what you’re looking for.

Use a Website on Your Computer, or App on Your Phone

Several websites and applications let you search for the name of a TV show or movie and show you exactly where that media is available for streaming online. They’ll even show you where it’s included free with a subscription and where it’s available for rental or purchase, letting you compare prices.

This is particularly convenient if you’re using a streaming platform that doesn’t offer this integrated search—like a PlayStation 4, Xbox One, Chromecast, or smart TV—or if you’re watching movies and TV shows on your phone, tablet, or computer.

We like Just Watch. It searches more than forty legitimate streaming services, including Netflix, Hulu, Amazon Prime, HBO, YouTube, and iTunes. Unlike some other options, it’s available for other countries, too—not just the USA.

Head to the website, search for a movie or TV show, and you’ll see exactly where it’s available. It’s a lot faster than searching several different services and comparing the price. If you’re searching for a TV show, you can even look at individual seasons or episodes to see where they’re available.

Read the remaining 9 paragraphs

10 Annoying Problems You Can Solve with Smarthome Devices

Smarthomes are easier to put together than ever. While they’re still not a necessity, what they are useful for is solving annoying problems around your home.

No More House Shouting

Smarthomes don’t always work well in family situations. Automation is particularly hard in homes with families and music integration can lead to account issues. But one area where Smarthomes shine is communication. If you’ve ever asked a child to tell the family there’s dinner, and all they did was yell “dinner” as loud as they can, you’ll appreciate both the Amazon Echo and Google Home’s intercom features.

Intercoms are normally annoying and difficult to install in a home, require wiring and sometimes making holes in the wall. But with an Echo or Home in different rooms, you can use either the Echo’s Announce or Google Home’s Broadcast feature.

The Echo’s announce feature lets you broadcast a one-way message to all the other Echos in your home (assuming they’re on the same Amazon account), but people can’t reply to the announcement. Google Home’s Broadcast feature is two-way, though; people can reply, and you’ll hear it on the Home device from which you broadcast.

Alexa’s does have a drop-in feature that lets you get a  two-way conversation going, but it only works between two Echo devices.

RELATED: Amazon Echo vs. Google Home: Which One Should You Buy?

Never Leave the Lights on Again

Read the remaining 50 paragraphs

Geek Trivia: Ethernet Superseded Which Network Technology?

Ethernet Superseded Which Network Technology?

  1. Serial Cable
  2. Token Ring
  3. Fiber Optic
  4. AppleTalk

Think you know the answer?

How to Add Music to Your PowerPoint Presentation

There are many ways to improve your PowerPoint presentation—adding animations to objects, customizing slide transition styles, and using interesting themes to name a few. In addition to all that, you can also add music to your presentation.

Adding Music to Your Presentation

PowerPoint makes it very simple to add music to your presentation. Adding music to your presentation may be a great idea, but there are also cases where it may be considered unprofessional. We’re not here to tell you when to do it, just how to do it, but make sure it’s appropriate for the situation.

Switch to the “Insert” tab and then click the “Audio” button.

Audio in media section

A menu will appear, giving you the option to either upload music from your PC or record your own audio track.

two audio options

If you’d like to record your own audio, select “Record Audio,” and the “Record Sound” window will appear. Go ahead and give your audio a name, then click the “Record” icon when you’re ready to start.

Record audio

Read the remaining 15 paragraphs

Windows Updates Break Administrator Account, FLAC Audio, and Windows Sandbox

The new year has barely begun, but more Windows 10 bugs have popped up. This time Microsoft has disabled built-in administrator accounts, caused problems with FLAC audio, and broken the new Sandbox feature along with Windows Defender Application Guard.

No Administrator For You

Most people haven’t enabled the built-in Administrator account at all, and it is disabled by default in Windows 10. So, as MSPoweruser notes, this only affects you if you’ve gone out of your way to enable that account.

Anyone who’s chosen to enable it probably expects it will still be there after upgrading. But, as explained on the Microsoft Taiwan blog, when you upgrade from the April 2018 Update to the October 2018 Update, the built-in Administrator account will be silently disabled if you have both the built-in administrator account activated and another administrator account present.

If you delete your local administrator account, you wouldn’t be able to gain administrator permissions on your PC. Microsoft says it plans a patch for sometime in January.

Where’s My FLACing Metadata?

According to MSPoweruser, FLAC support was already partially broken in the April 2018 Update. But only rating music and editing metadata was broken. You could still listen to your music.

Updating to the October 2018 puts a stop to even that. After taking the update, metadata for FLAC files will be truncated, or cut off. When you try to listen to a FLAC file in Groove Music or Windows Media Player, the first minute or so of the track will be skipped.

The good news is that this seems fixed in an Insider Build. The bad news is the fix hasn’t been brought to the October Update, and this isn’t listed as a known issue. So it’s hard to say when this will be fixed.

Sandbox and Application Guard Breakage

We really like the new Sandbox feature in the latest insider build. And Application Guard is a useful security feature if you want a locked down browser, too.

Read the remaining 5 paragraphs

Wednesday, 2 January 2019

USB-C Is Going to Get A Lot More Secure

As more devices move to USB-C for charging and data needs, it’s also becoming more clear that the tech needs improved security. Today, the USB Implementers Forum is announcing one such change with USB Type-C Authentication.

This new security feature will allow devices to authenticate USB-C connections for legitimacy, both on charging and data connections. Once implemented, the device will instantly verify that a connected USB-C device is indeed legitimate, then blocking or allowing the connection accordingly.

So, for example, consider the benefit when using public charging stations. Currently, this is a security risk—once you connect your device, what happens next is generally out of your control. If the station is compromised, your data could be at risk. With USB-C Authentication, however, the connected device could see that the source is a non-compliant charger and immediately block its access to your device before any data is accessed.

RELATED: How to Protect Yourself From Public USB Charging Ports

The USB-C Authentication press release goes into more detail, but here are the highlights of the feature:

  • A standard protocol for authenticating certified USB Type-C chargers, devices, cables and power sources
  • Support for authenticating over either USB data bus or USB Power Delivery communications channels
  • Products that use the authentication protocol retain control over the security policies to be implemented and enforced
  • Relies on 128-bit security for all cryptographic methods
  • Specification references existing internationally-accepted cryptographic methods for certificate format, digital signing, hash and random number generation

Of course, device manufacturers and operating system developers will need to include support for USB-C Authentication before it offers anything meaningful, and that’s also the biggest downside—this is simply a suggestion at the current time, not a requirement. Hopefully, most manufacturers will see the value in such a system and add it voluntarily.

via BusinessWire

The Best Premium Leather iPad Cases

No matter what iPad you use, you’ll want a case to protect it. But if you’re feeling fancy, or you’re looking for a gift for an iPad user who would appreciate something more premium, you can’t beat leather.

We’ve selected the best genuine leather cases on the market. There’s no “PU” or “vegan” leather here: this is the real McCoy, genuine dead cow. That’s not for everyone, of course. Some might object to the material on environmental grounds or not want a case that needs a little care to keep looking great, so make sure your gift recipient is okay with leather before making your choice. But for most users, these are all great options for more elegant protection.

We’ve found the best general leather case option, the best for those who prefer a larger “folio” style or a more minimal integrated stand, the best sleeve design, and a novelty “book” case that makes a great gift if you’re looking for something unique. Note that we’re not breaking down our selections by iPad model: for each choice below, you should be able to find versions that will fit the standard iPad, the iPad Mini, and the various iPad Pro models.

The Best All-Around Leather iPad Case: Noreve Tradition ($86-185)

tradition, noreve, leather case, premium leather, ipad case, leather,

For the general user, this design from French case maker Noreve is the best choice. It includes a full wrap-around shell that protects the tablet itself, a fold-over cover for the screen, and integrated organizer sleeves for extra trinkets like a screen cleaner cloth and notes. The back of the case has a small fold-out kickstand for hands-free viewing, though the Story Leather case below is probably a better choice if you frequently watch videos on your tablet. There are cutouts for the buttons and camera, and a stylus can be secured in the cover snap.

The Noreve case comes in a variety of leather qualities, from PU (read: fake) up to aged and patinated leather in a wide selection of colors. The sweet spot is Noreve’s “Illumination” patent leather, which comes in black, grey, or natural leather for a little over $100 on the standard 9.7-inch iPad. Some of the more expensive leathers and colors may take longer to ship; click the “In Stock” tab on Noreve’s online shop if you’re in a hurry.

The Best Leather Folio iPad Case: Pad and Quill Oxford ($110)

oxford, pad and quill, leather, folio, ipad, ipad case, leather case, premium,

Folio cases are a bit bulkier than a standard case, but they offer more protection and an appealing fold-out design. Pad and Quill’s Oxford, which goes for $110 on the standard iPad, is the one to beat. Its natural leather finish looks fantastic and feels even better, with premium stitching on all seams and a loop for your stylus.

Read the remaining 12 paragraphs

The Roku Channel is Coming to Android and iOS, Premium Add-Ons in Tow

For years, Roku has been known for its streaming boxes and sticks, but that’s slowly changing as the company invests more in streaming services. It started with The Roku Channel, and now that’s growing into something more.

The Roku Channel, which originally offered access to free, ad-supported movies and shows through Roku devices, broke out of the box and into the browser in August of last year. Roku has apparently seen success with this model because now that’s expanding in a big way.

First off, you’ll now be able to access The Roku Channel on both iOS and Android devices, dramatically increasing the channel’s availability and usefulness. All the same content will be along for the ride without cost—you just need a Roku account.

What’s more, the company announced this morning that it would also start offering access to premium subscription channels like HBO as part of The Roku Channel. That means users will be able to add multiple services to their Roku account, pay them all on one bill, and watch them all in one place—this rivals what Amazon does as part of its Prime Video package, or services like Sling have been doing for years.

The biggest difference here is that The Roku Channel doesn’t require any sort of subscription in the first place. Amazon requires Prime membership before it offers any add-on streaming service, and TV providers like Sling naturally require users to be signed up for their service in the first place. As far as I can tell, Roku is the first service to bundle premium subscriptions into an otherwise free app.

This is clearly a power move by the company and a smart one at that. Loads of users already access content on The Roku Channel—some of which I’m sure don’t have access to any other streaming service—and this will make it easy for them to bundle extra services.

The Roku Channel is available today on iOS and Android devices as part of the Roku app, with premium subscriptions making their way out starting later this month.

via The Roku Blog

How to Use Google Assistant With Your Roku

As more of our devices connect to each other, it’s always nice to know that different products from different companies work together. A Chromecast isn’t expensive, but being able to use your TV directly with Google Assistant is better.

Roku has long supported Google services like YouTube and Play Movies, but a recent update took it one step further: you can now use your Roku with Google Assistant voice commands. This feature is limited to the United States for now, and Netflix support isn’t available.

Make Sure Your Roku’s Software is Up To Date

Your Roku will need to be running Roku OS 8.1 or newer to use Google Assistant. Start by turning on your Roku smart TV, streaming stick, or streaming box. Select “Settings” on the left.

Next, select “System” and then “System Update.”

Select “Check Now.”

Read the remaining 20 paragraphs

Upcoming Chrome OS Feature Secures USB Ports When The Device Is Locked

Chromebooks are inherently secure machines—they’re essentially impervious to viruses and similar threats found on other machines. The one primary weakness is a physical one, but Google is making moves to fix that, too.

There’s a malicious USB tool called a Rubber Ducky that emulates a keyboard and has the capability of injecting up to 1000 keystrokes per minute onto any machine which it’s inserted. As long as a would-be wrongdoer has physical access to your computer, all they need to do is insert the USB key and let it do the rest.

Since this is a physical weakness, that means Chromebooks are just as susceptible the Rubber Ducky attacks as other machines. But Google is working on a new feature for Chrome OS called USBGuard that will eliminate this threat by blocking access to USB ports on locked Chromebooks.

While this is still a work in progress, it appears that the feature won’t simply block access to USB ports across the board, but instead keep ports that are currently in use alive. So, if you’re transferring files from a USB drive and the ‘book goes to sleep, the transfer will continue. Similarly, users will be able to whitelist specific devices—like mice and keyboards, for example—so they’re always available regardless of the Chromebook’s lock state.

The USBGuard flag is already available on the Chrome OS Canary channel for those who live dangerously but should be available to more users on other channels in the coming weeks or months.

ChromeStory via Engadget

How to Set Up Haptic Touch on an iPhone XR

The iPhone XR does not have 3D Touch, instead relying on something called Haptic Touch. It offers much the same features, and as of right now, it’s an iPhone XR exclusive. Here’s how to set it up.

If you’re new to the iPhone XR, you may not realize that you have Haptic Touch, and you wouldn’t be the first, either. Haptic Touch is the iPhone XR’s replacement for 3D Touch, something most iPhone owners played with and then forgot about.

What is Haptic Touch?

Haptic Touch acts as a right-click of sorts, allowing iPhone XR owners to activate menus and buttons that would normally be unavailable. Activating Haptic Touch on a notification, for example, presents additional options for notification management. Another example of where Haptic Touch can be helpful is in Control Center, where users can tap-and-hold on an icon to gain more granular control of a feature.

To alert users that Haptic Touch has been activated, iOS generates a small vibration to mimic a click.

How 3D Touch and Haptic Touch Differ

The differences between the two are fairly minor, with the implementation of the two features being the main difference. While 3D Touch requires a firm press on the iPhone’s display, Haptic Touch instead has them press-and-hold until they feel a haptic response.

The differences continue into what you can do with Haptic Touch. For the most part, anything that works via 3D Touch is also possible with Haptic Touch, which two notable exceptions. First, you can’t access app-based shortcuts from the Home screen. Second, Haptic Touch does not support “peek & pop,” a feature that offers previews of anything from images to URLs. That’s the biggest miss of the two, but you pays your money, you takes your choice.

With all that said, if you’re an iPhone XR owner then you should at least take Haptic Touch for a spin.

How to Set up Haptic Touch

Whether you’re new to Haptic Touch or are a 3D Touch veteran, open Settings to get the ball rolling and then tap “General.”

Read the remaining 10 paragraphs

The Best In-Wall Smart Outlets

Smart plugs are a convenient way to add smarts to just about any appliance, but if you want a more permanent and cleaner solution, in-wall smart outlets are the way to go. Here are the best ones that are worth purchasing.

Of course, in-wall smart outlets aren’t for everyone. Renters and even just those who aren’t comfortable messing with electrical wiring can benefit from smart plugs instead. However, if you’re able to, installing in-wall smart outlets is a great way to avoid bulky smart plugs and present a cleaner look. Here are the ones that we’d consider buying.

A Wi-Fi Option: Topgreener Smart Wi-Fi Outlet ($42)

Once installed, the Smart Wi-Fi Outlet from Topgreener connects directly to your home’s Wi-Fi network and gives you one always-on receptacle, with the other controlled by your phone or voice.

The one smart receptacle also monitors your energy usage, so you can get a better idea of just how much electricity that space heater is pulling.

You can also do things like create scenes, set schedules and timers, take advantage of geofencing, and even enable an away mode that can turn lamps on and off randomly to simulate someone being home. It also works with both Alexa and Google Assistant.

Most importantly, the outlet is tamper resistant, UL listed, and NEC compliant.

A Z-Wave Option: Honeywell Z-Wave Smart Outlet ($40)

Read the remaining 6 paragraphs

Exposure Values Give You a Better Understanding of How Your Camera Works

In photography, we talk a lot about “stops”: it’s the standard measure of exposure where an increase of one represents a doubling of the amount of light hitting the sensor or film. One thing that a lot of photographers don’t realize is that exposure actually has an absolute scale. Let me explain.

RELATED: What Is a “Stop” in Photography?

Exposure Values and Stops

When you learn the basics of the exposure triangle—shutter speed, aperture, and ISO—it’s important to know that there are multiple combinations of aperture and shutter speed that give the same exposure, even if the photo might look different because of your chosen aperture or shutter speed. For example, if you were shooting a portrait outdoors and wanted a shallow depth of field, you might go with f/2.0 for 1/2000th of a second; a few moments later if you instead decided to shoot a landscape, you could use f/16 for 1/30th of a second. In both instances, the exact same amount of light hits the sensor, so the brightness and exposure of everything will be identical, but the photos will look totally different because of the different aperture and shutter speed.

But how do you know which combinations to use? Sure, you can go with trial and error, but there is actually a definitive scale that’s seldom taught. Both f/2.0 for 1/2000th of a second and f/16 for 1/30th of a second have an Exposure Value at ISO 100 (EV100) of 13. There are lots of other combinations that also have an EV100 of 13 like f/8 for 1/125th of a second or f/4 for 1/500th of a second.

And here’s where things get even neater: an EV100 of 13 actually corresponds to some real-world lighting conditions. A cloudy day or the sky just before sunrise generally has an EV100 of 13, so any combination of aperture and shutter speed that also has an EV100 of 13 will work perfectly.

Why Exposure Value is Worth Understanding

Before going further, I want to step back and explain why EV is worth understanding; it’s unlikely you’ll ever need to break out EV tables to calculate what shutter speed to use while you’re on a shoot.

Instead, what an understanding of EV gives you is a deeper understanding of what your camera is doing and why. I’m a big believer that every photographer can benefit from knowing what’s going on with their camera when they press the shutter button. It’s this kind of knowledge that lets you pick the right light meter mode or autofocus settings without just guessing.

Read the remaining 13 paragraphs

What Exactly Happens When You Turn On Your Computer?

When you power on a computer, it goes through a “boot up” process– a term that comes from the word “bootstrap.” Here’s what’s happening in the background—whether you’re using a Windows PC, Mac, or Linux system.

The Hardware Powers On

When you press the power button, the computer supplies power to its components—the motherboard, CPU, hard disks, solid state drives, graphics processors, and everything else in the computer.

The piece of hardware that supplies power is known as the “power supply.” Inside a typical desktop PC, it looks like a box at the corner of the case (the yellow thing in the picture above), and it’s where you connect the AC power cord.

The CPU Loads the UEFI or BIOS

Now that it has electricity, the CPU initializes itself and looks for a small program that is typically stored in a chip on the motherboard.

In the past, the PC loaded something called a BIOS (Basic Input/Output System.) On modern PCs, the CPU loads UEFI (Unified Extensible Firmware Interface) firmware instead. This is a modern replacement for the old-style BIOS. But, to make it extra confusing, some PC manufacturers still call their UEFI software “BIOS” anyway.

RELATED: What Is UEFI, and How Is It Different from BIOS?

The UEFI or BIOS Tests and Initializes Hardware

Read the remaining 23 paragraphs

Geek Trivia: The Introduction Of What Led To A Significant Rise In U.S. IQ Levels?

The Introduction Of What Led To A Significant Rise In U.S. IQ Levels?

  1. Iodized Salt
  2. Fluoridated Water
  3. Jeopardy
  4. Computers in Schools

Think you know the answer?

Global tech show CES 2019 to celebrate innovation amid mounting concerns

"Smart" devices using various forms of artificial intelligence will again be a major focus at CES 2019.

Tuesday, 1 January 2019

Why You Shouldn’t Buy A 5G Phone In 2019

How to Clean the Dust Out of Your Laptop

How To Thoroughly Clean Your Dirty Desktop Computer

Just like your car, your house, and even your body, your computer needs a good cleaning every once and a while to prevent dust build up and overheating.  Cleaning a PC is easy to do and only takes about 20 minutes, so today we’re going to cover how to effectively clean the inside of your desktop computer.

Editor’s Note: This article shows how to completely clean everything inside of the computer case. You don’t necessarily have to remove the RAM and video card if you don’t want to. We do recommend cleaning your computer on a regular basis.

How often should I clean my computer?

Depending on your environment, you may need to clean your computer more or less often. Computer placement is one important variable. Keeping your computer on the floor allows for dust, hair, skin cells, and carpet particles to get inside easier. If you keep your computer above the floor—say, on your desk—particles are less prone to getting inside.

If you smoke near your computer, tar, ash, and other gunk can build up in your computer’s fans and on inside surfaces. Ridding your computer of these things every 6 months can increase your computer’s performance.

If you’re the owner of a pet that sheds, you might want to clean your computer more often. The inside of your computer is just as susceptible to fur clogging fans and other areas of your computer.

In short, if you keep your computer off the floor, don’t smoke, and don’t have shedding pets, you can probably get away with cleaning your computer once per year. If any of those things do pertain to you, you might want to clean your computer every 6, or even 3, months. And, as always, if your computer starts getting hotter than usual, open it up to check for any dust or hair buildup and then clean it.

Preparation

Do not open your computer while it is running or with any cables attached to it. It is always safer to remove all peripherals such as USB cables, audio cables, video cables, and especially the power cable. Yes, keeping the power cable connected does ground the PC and it’s often okay to leave it connected while working inside the case. But, even the tiny trace of moisture from canned air can cause trouble if the components are getting power.

Read the remaining 42 paragraphs

Geek Trivia: Who Is The Only Person To Have Played Themselves In The Star Trek Universe?

Who Is The Only Person To Have Played Themselves In The Star Trek Universe?

  1. Carl Sagan
  2. Buddy Holly
  3. Jimmy Carter
  4. Stephen Hawking

Think you know the answer?

Why self-driving car is still some distance away

The boundless optimism that surrounded driverless cars only a few years ago has been tempered by a slew of challenges.

How to Disable Ad Banners on Firefox’s New Tab Page

Mozilla just “experimented” with advertisement banners for Booking.com, a hotel reservation website, on Firefox’s New Tab page. Here’s how to disable all those banners so you never see any of these ads in the future.

A Mozilla spokesperson told VentureBeat that this “was not a paid placement or advertisement,” and was “an experiment to provide more value to Firefox users through offers provided by a partner.” Who does Mozilla think they’re fooling?

Anyway, if you don’t want to see these advertisement banners in the future, there’s a simple solution.

Click Menu > Options > Home, or just click the gear-shaped “Options” button at the top-right corner of FIrefox’s New Tab page.

Under Firefox Home Content, uncheck “Snippets.” This will disable all those message banners at the bottom of Firefox’s New Tab page, including ones hawking hotel booking websites.

While you’re at it, you may also want to uncheck Pocket’s Sponsored Stories, which are another type of advertisement that Mozilla places on your New Tab page.

Read the remaining 7 paragraphs

How to Convert HEIC Images to JPG on a Mac the Easy Way

Apple started using the HEIC image format with iOS 11. It’s preferred over the incumbent JPG because of its smaller file sizes, and it’s also made its way to the Mac. HEIC can cause problems for some apps. Here’s how to easily convert HEIC files to JPG.

If you live your life on iOS, then the chances are pretty good that you never really know when an image is in the HEIC or JPG formats because, for the most part, it doesn’t matter. However, when you start sharing images or saving them to your Mac for future use, you might want them in a more common format. That tends to happen most on a Mac, so wouldn’t it be great if there was a quick and easy way to convert any number of HEIC format images into JPG? If you don’t mind getting your hands a little dirty with Automator, a quick and easy way you shall have.

Let’s get started.

Setting up the Quick Action

Launch Automator on your Mac—it’s in your Applications folder, or you can use Spotlight to search for it—and then click “New Document.”

Next, from the list of templates, click “Quick Action,” followed by “Choose.”

Over on the left side of the screen, type “copy finder” into the search box and then drag “Copy Finder Items” to the right-hand side of the screen. Here, you can then select the folder to which you want to save the converted images.

Read the remaining 12 paragraphs